
지난 시간에 이어서 '플렉스 박스 레이아웃'입니다. '플렉스 박스 레이아웃'을 사용할 때 유용한 추가 속성들을 살펴 보겠습니다.
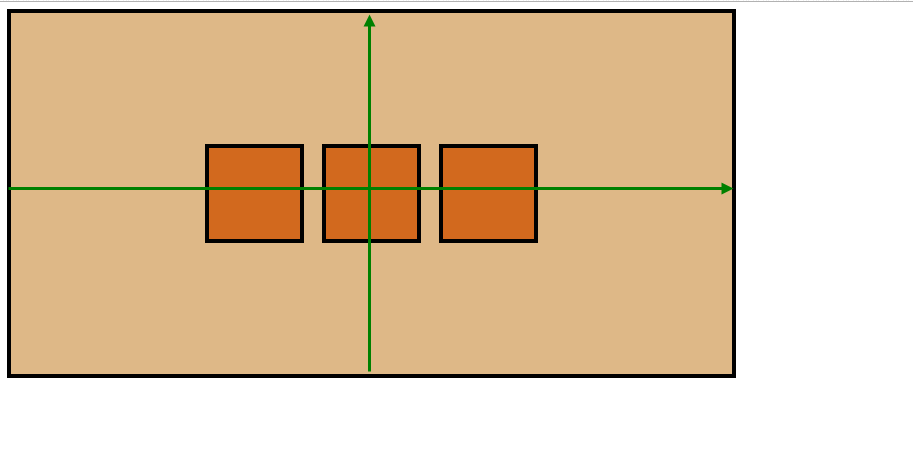
먼저 지난시간에 하던 예시를 이어서 보여드리겠습니다 :)
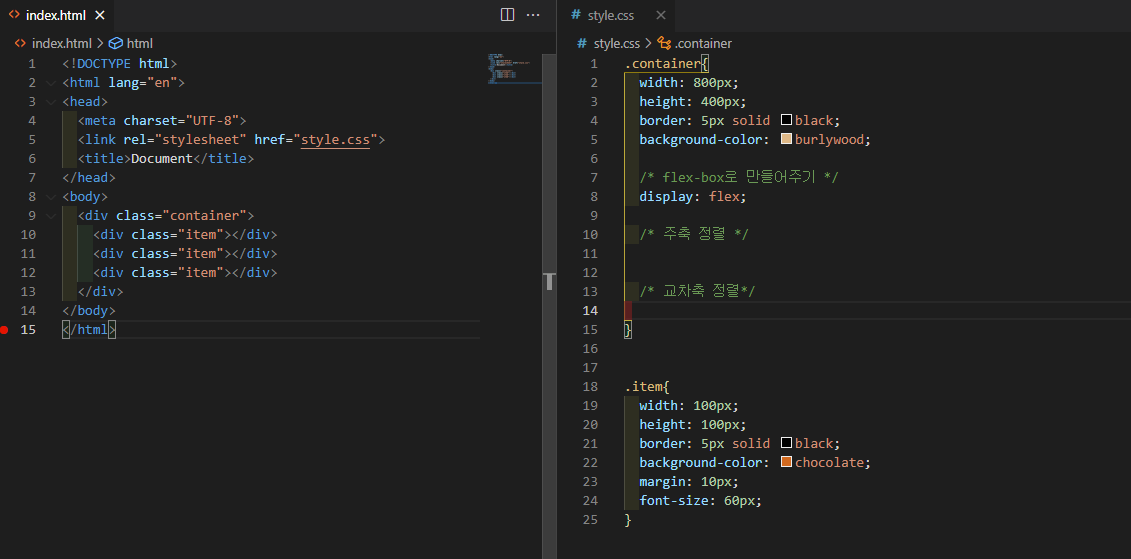
<!DOCTYPE html>
<html lang="en">
<head>
  <meta charset="UTF-8">
  <link rel="stylesheet" href="style.css">
  <title>Document</title>
</head>
<body>
  <div class="container">
    <div class="item"></div>
    <div class="item"></div>
    <div class="item"></div>
  </div>
</body>
</html>
.container{
width: 800px;
height: 400px;
border: 5px solid black;
background-color: burlywood;
/* flex-box로 만들어주기 */
display: flex;
/* 주축방향 정렬 */
justify-content: center;
/* 교차축방향 정렬*/
align-items: center;
}
.item{
width: 100px;
height: 100px;
border: 5px solid black;
background-color: chocolate;
margin: 10px;
font-size: 60px;
}
flex-box TIP!
1. flex-direction
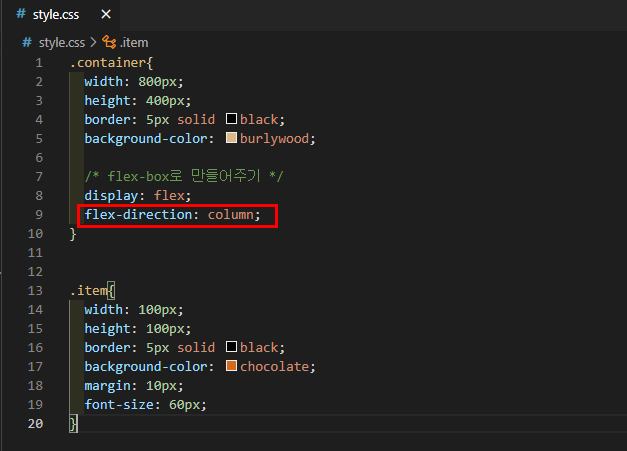
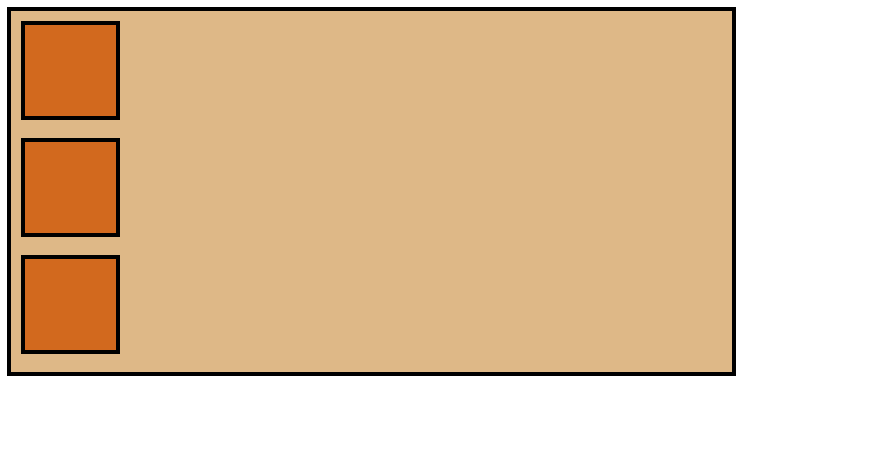
flex-direction 속성을 바꾸면 요소들의 요소들의 최초 배치를 바꿀 수 있습니다 :)
flex-direction: row; -> flex-direction의 기본값은 row입니다.
만약 flex-direction: column;으로 해주면
짜잔~ 이렇게 됩니다!
2. 요소 사이에 공간 두기 space
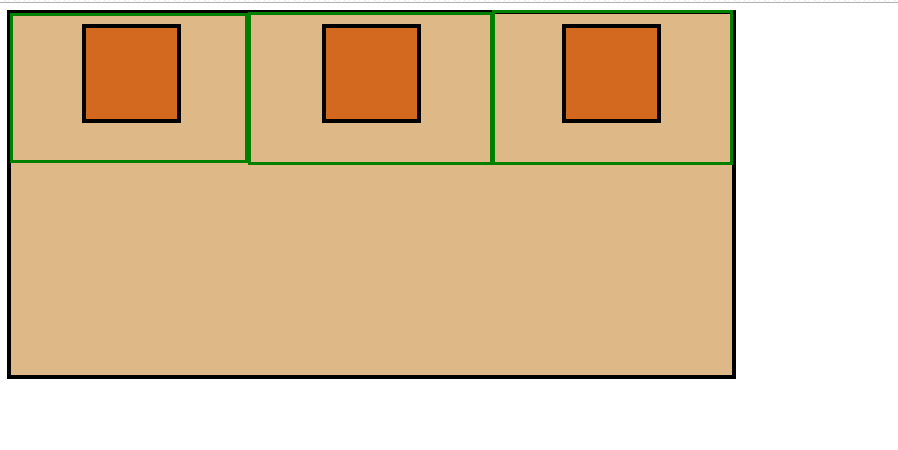
justify-content: space-around;
: 요소를 감싸고 있는 둘레(around)에 일정한 간격을 생성해줍니다.
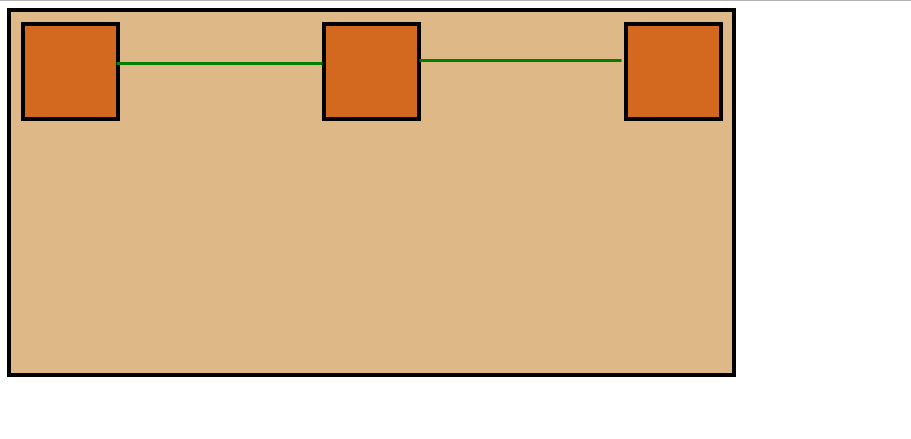
justify-content: space-between;
: 요소들의 사이간격(between)이 일정하게 생성됩니다.
justify-content: space-evenly;
:요소들의 사이+양끝(모두 evenly)에 균일한 간격을 생성해줍니다.

'지금, 개발하기 > CSS' 카테고리의 다른 글
| HTML/CSS] before, after 가상요소 (0) | 2023.08.08 |
|---|---|
| HTML/CSS] label 태그는 언제 쓰는 건가요? (0) | 2021.10.05 |
| HTML/CSS] flex- box로 요소 배치하기 (0) | 2021.08.21 |
| HTML/CSS] float을 이용하여 왼쪽/오른쪽 정렬하기 (0) | 2021.08.20 |
| HTML/CSS] Position으로 요소 배치하기 (0) | 2021.08.18 |


